
Go to the content
Remote Access (VPN)
The Scuola Normale's VPN service allows users to connect remotely, securely and encrypted, to the School's restricted IT resources. Through VPN, you can access workstations, file servers, and databases as if you were physically on the SNS. The service requires installing a dedicated application on your device.
Features
- Secure remote access to restricted SNS network resources.
- Connection to research workstations via remote desktop or terminal.
- Access to personal folders on the Aristotele file server.
- Access to restricted databases and subscription journals via the website biblio.sns.it.
- Encryption of data traffic during internet connection..
Requirements
- You must have a University SNS account.
- You must have administrator rights on your computer to install the software.
Designed for
Faculty members, Students, Technical and administrative staff
Get started
- Download the GlobalProtect Agent software from the official download link, selecting the version compatible with your operating system.
- Install the GlobalProtect Agent software on your device.
- Follow the configuration instructions specific to your operating system:
- Windows: refer to the dedicated Windows guide.
- Mac: refer to the dedicated Mac guide.
- Linux: refer to the page Install the VPN for Linux.
- Once the installation is complete, launch GlobalProtect Agent and check the connection status via the icon in the system tray (Windows) or the top menu bar (Mac): the absence of the red X indicates that the VPN is connected.
FAQ
After installing GlobalProtect Agent, an icon appears in the system tray (Windows) or top bar (Mac). If the icon shows a small red X, the VPN is not connected; otherwise, the connection is active.

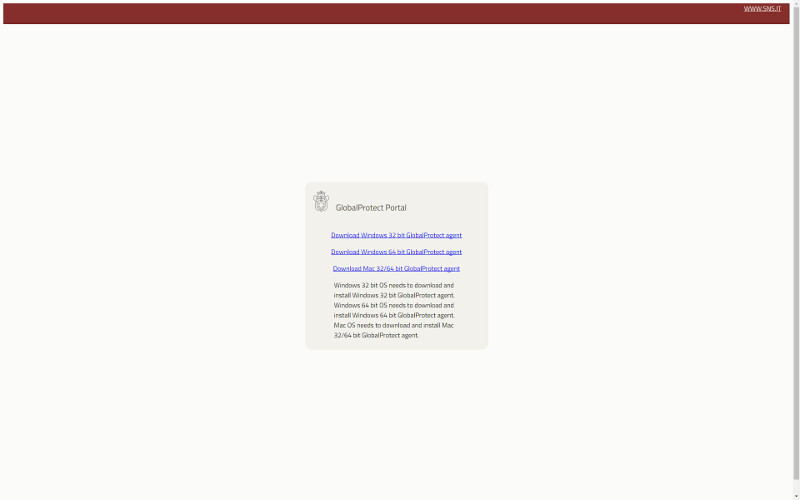
Client download link: Download Palo Alto Network GlobalProtect VPN client.
Connection parameters
portal : vpngw.sns.it
user: name.surname@sns.it
password: <University password>
Go to the GlobalProtect Agent software download page and download GlobalProtect agent for Mac
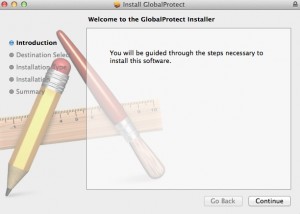
Once the file is downloaded, double-click on the package icon.

Selezionare Continue.
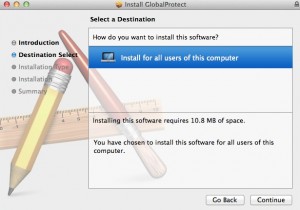
On the next screen, select where to install the software, then press Continue.
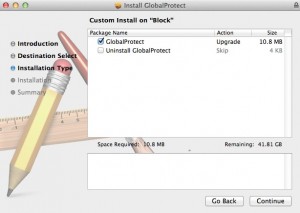
Select the GlobalProtect checkbox and press Continue.
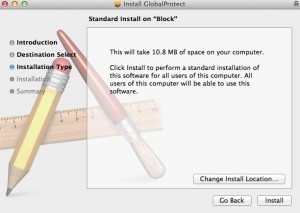
Confirm the installation location and press Install.
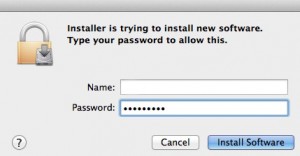
To complete the installation, administrator privileges are required, so enter your username and password.
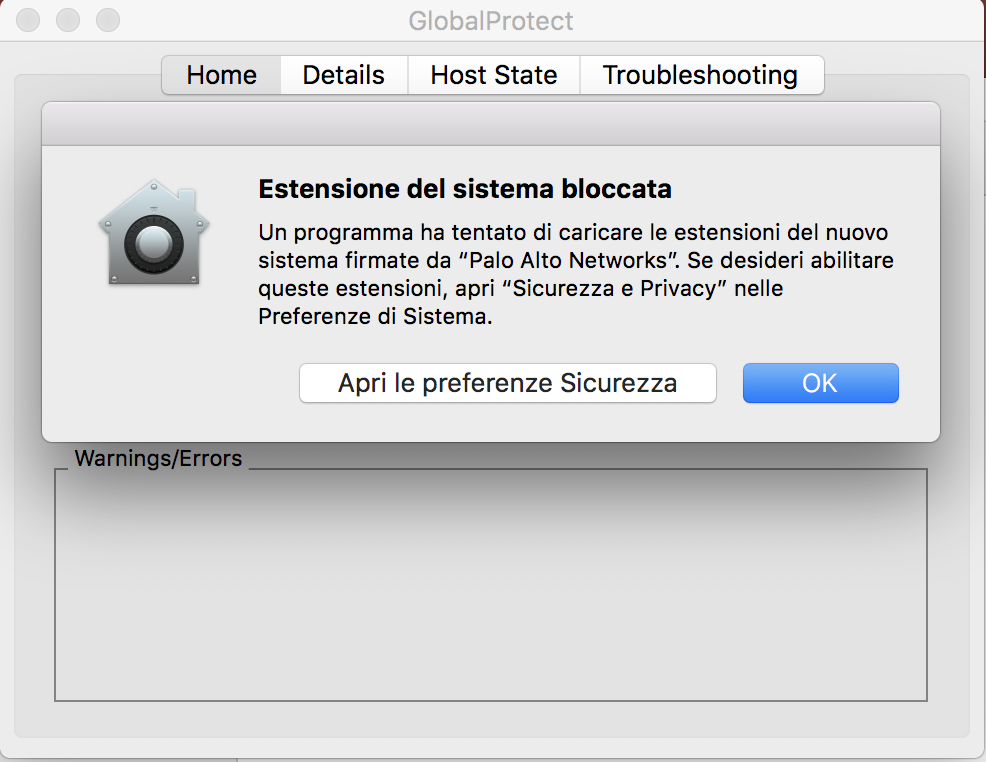
Depending on your system settings, the following screen may appear asking you to enable the "Palo Alto" extension. Click "Open Security Preferences".
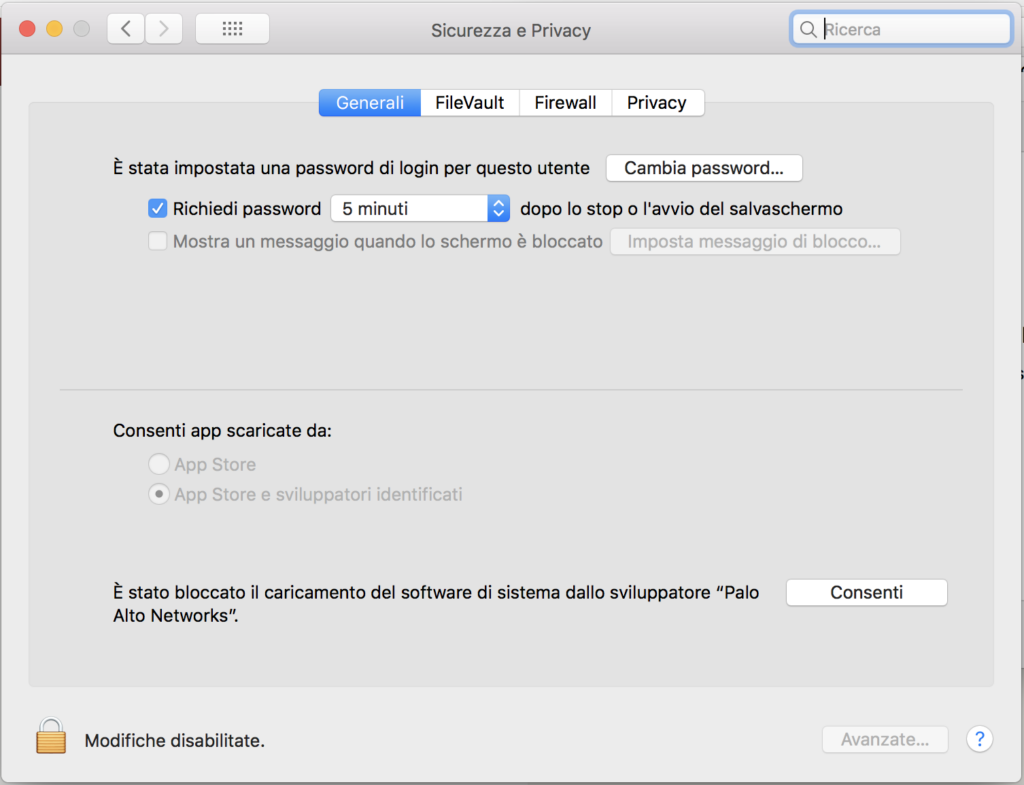
From the System Preferences interface, Security & Privacy panel, click the Allow button next to the words "System software from the developer "Palo Alto Networks" has been blocked from loading," as shown in the following screenshot.
Once installation is complete, press Close immediately after deciding whether or not to move the installation files to the Trash (the recommended choice is to move them to the Trash).
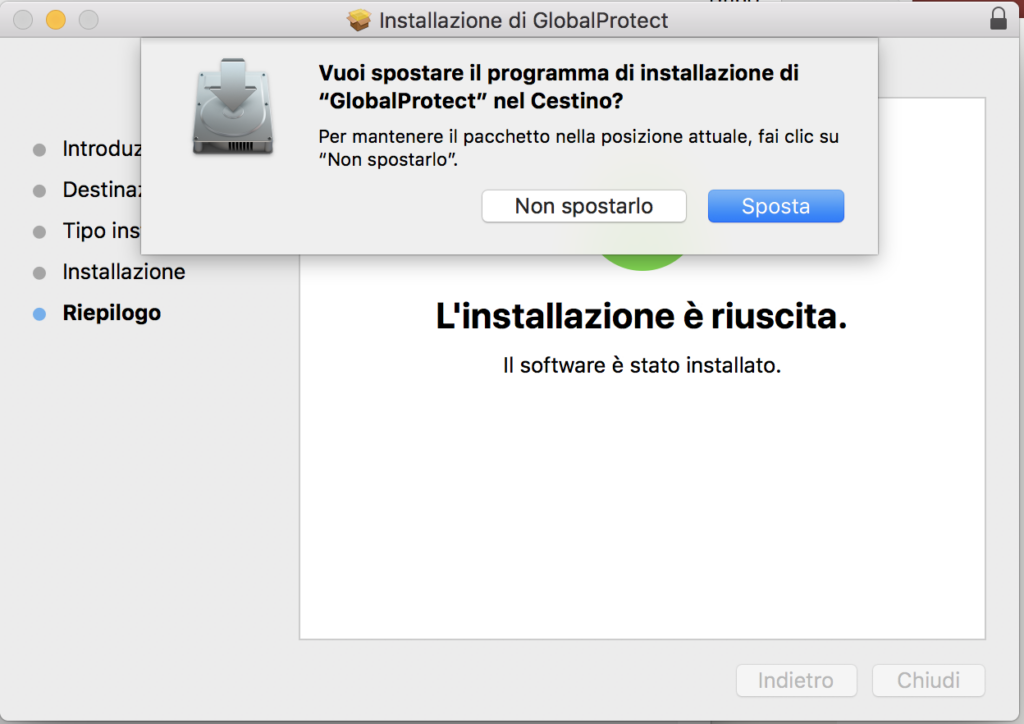
The GlobalProtect Agent is now installed and all that remains is to configure the VPN with the correct parameters as indicated below.
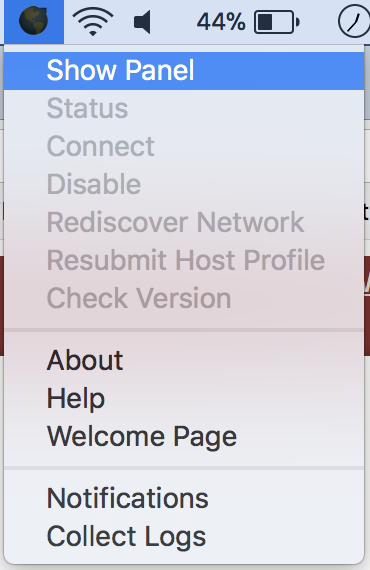
Click the globe icon that appears on the taskbar to open the menu. Then click Show Panel to open the Global Protect control panel.
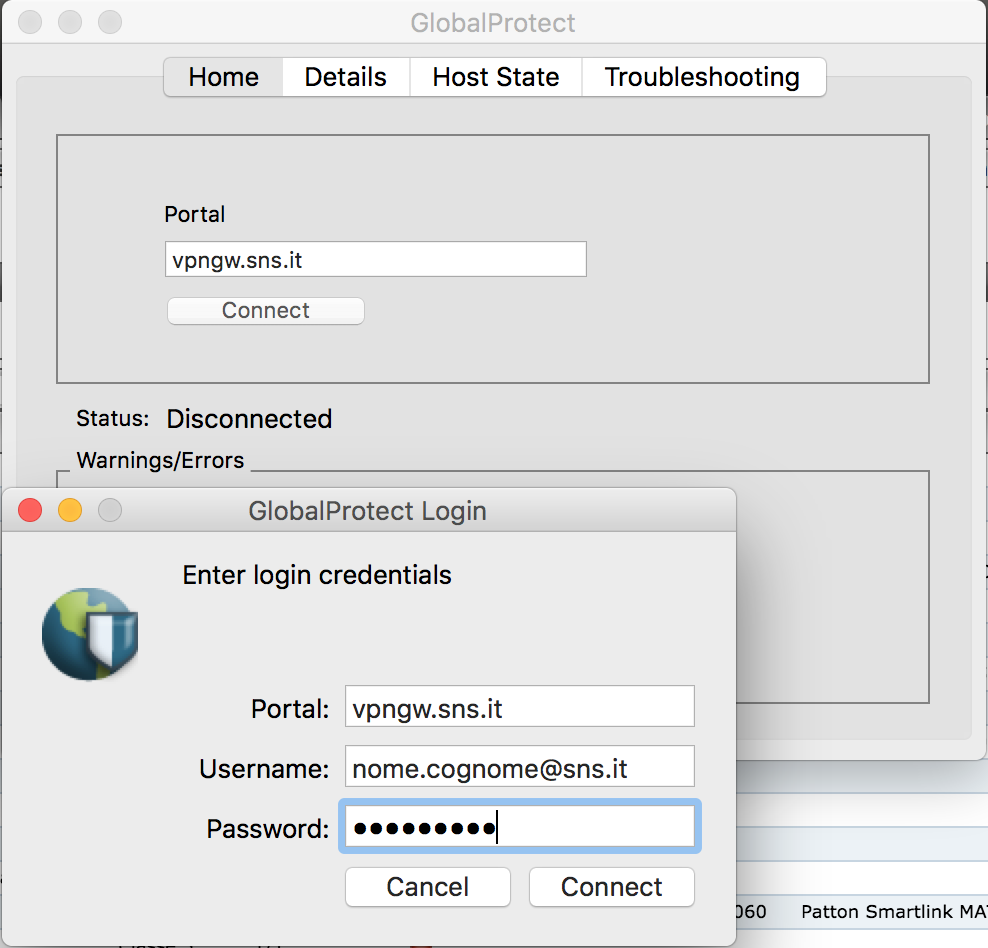
On the Home tab, enter vpngw.sns.it (without https://) in the portal field and click Connect. A second form will open where you must enter your University credentials in the form name.surname@sns.it. Click Connect again.
Client download link: Download Palo alto Networks GlobalProtect VPN client
Connection parameters
portal: vpngw.sns.it
user: name.surname@sns.it
password: #University password#
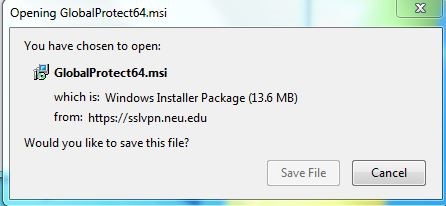
Go to the GlobalProtect Agent software download page and download the Windows 32 or 64 version depending on your system (to find out if your computer has a 32 or 64-bit version, follow these instructions).
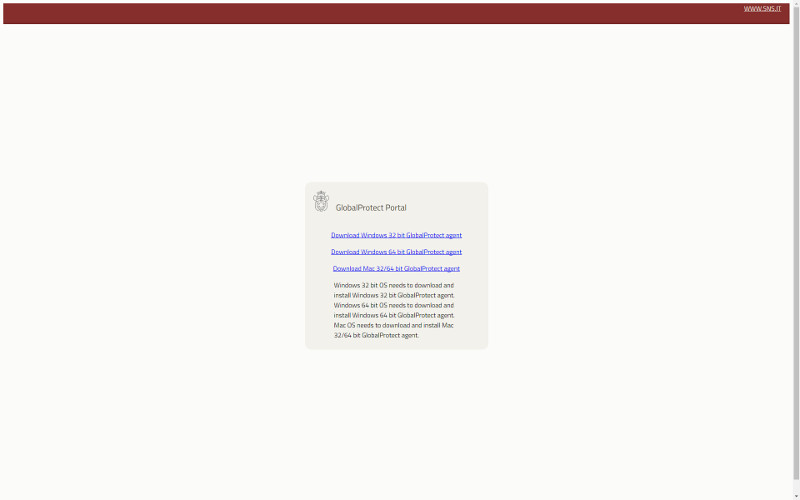
Once you click on the correct version, Firefox and Chrome browsers display a dialog box like the one below. Run the file.
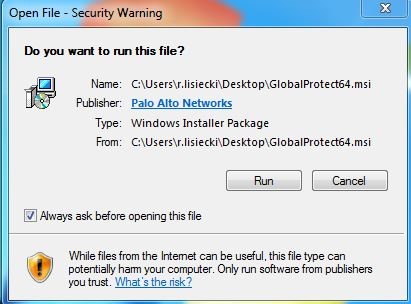
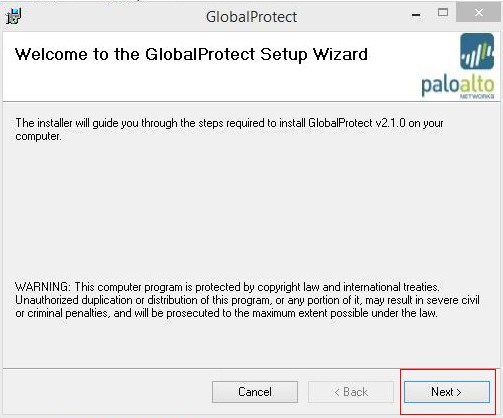
Continue with the installation through the Wizard by pressing the Next button without changing any options.
When the installation is complete, press Close.
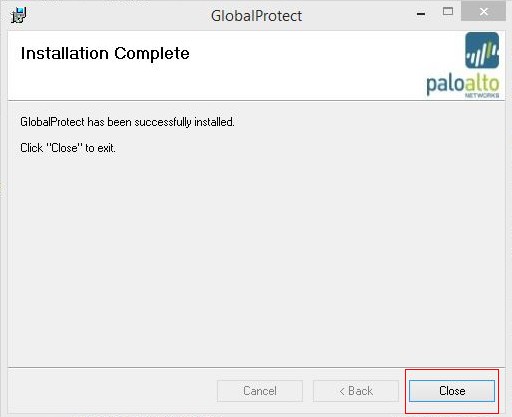
The GlobalProtect Agent is now installed. Now follow the instructions below to configure the VPN.
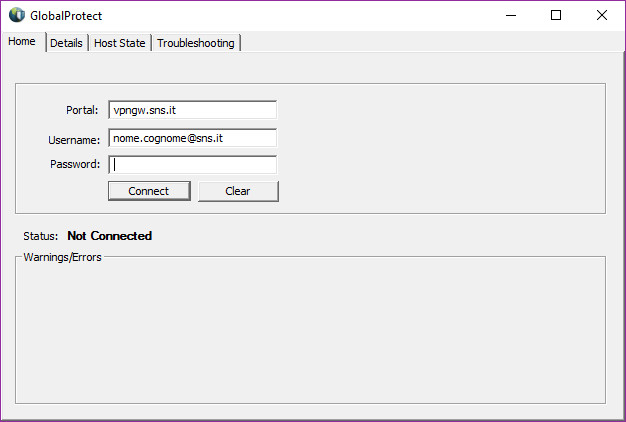
In the Home tab, username and password fields, enter your university credentials and in the portal field enter vpngw.sns.it (without https://).
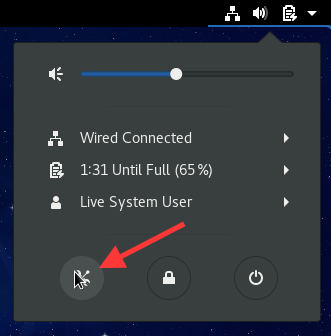
Select network settings.
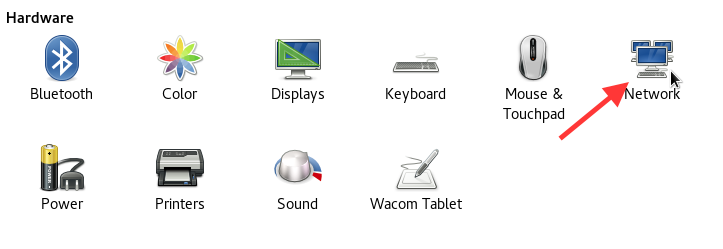
Select Network.
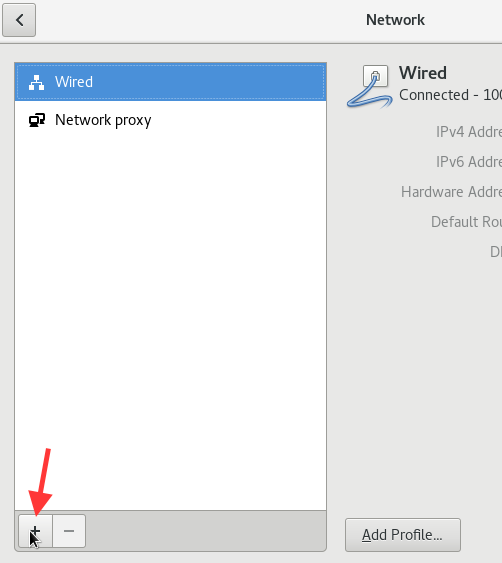
Press the + button to add a new network connection.
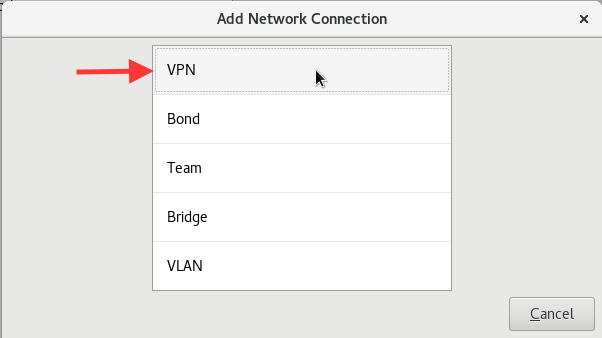
Select the VPN item.
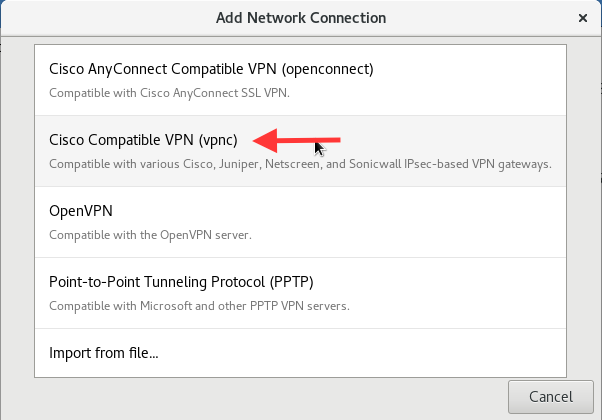
Select Cisco Compatible VPN (vpnc). If this item is not listed, you will need to install the appropriate package: refer to your distribution's documentation.
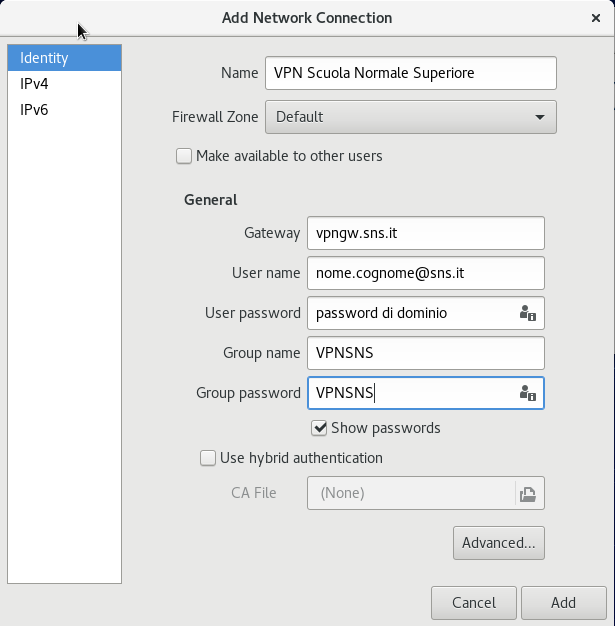
Select the Identity option and fill in the fields. In particular, in the Gateway field, enter vpngw.sns.it, in the Username and Password fields, enter your University credentials, and in the Group Name and Group Password fields, enter VPNSNS. Press Add.
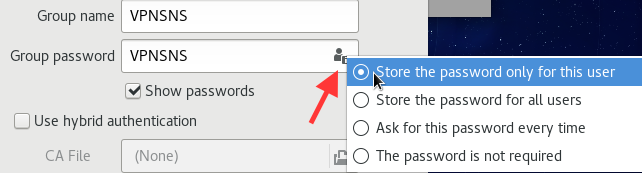
To save your password for future logins, click the icon in the Group password text field. A menu like the one shown below will open.
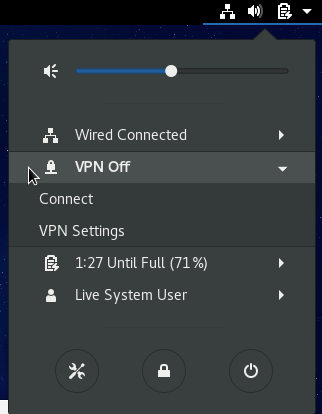
The procedure described above only needs to be performed the first time. Subsequent times, to connect to the VPN, click on the bar at the top right and select Connect.
Make sure you have administrator rights on your computer. If you do not have these rights, contact the Helpdesk to request installation. If the problem persists even with the correct rights, contact the Help Desk.
Make sure you're connected before accessing resources.
If you're using a corporate network, check with your network administrator to ensure there are no restrictions on using external VPNs.
On Windows, if you receive a "Resend credential" error, uninstall and reinstall the application with administrator rights.
On macOS Mojave, if the credentials field doesn't appear, go to System Settings → Security & Privacy and add Palo Alto - GlobalProtect to the allowed applications.
If the problem persists, contact the Help Desk.
Last modification: 04/05/2026